Since I was on a roll with my conspicuous consumption of prim usage, I decided to build a bench for the park. Not a two prim bench - mind you -- A BENCH. So here we go.
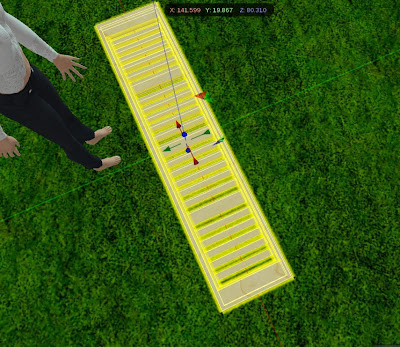
I made a box and adjusted the size to approximate the finished bench size and I hollowed it. I then HELD DOWN THE SHIFT KEY while pulling UP on the prim ( the blue arrow) -- thus making a copy that was aligned with the prim below.
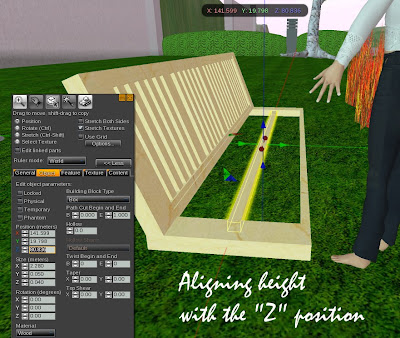
I resized the second prim to make the larger of two slats, taking out the hollow and setting that field back to zero. I made sure that the "Z" values of the new slat and the original prim were the same. Even though I had made the new slat thinner they would be aligned. You can also use Shift + Z here but I have run into problems with that here so staying away from it most of the time.

I then HELD DOWN THE SHIRT KEY (this is called Shift - Copy by many) and pulled to the left and made a copy of that larger slat. Three more slats were needed so more shift copying was necessary. You can of course hold down the SHIFT key and click on a second object and then Shift-Copy them BOTH at the same time. I aligned the slats by eye. You can use math if you prefer.
Using the same method, I filled in the open areas with smaller slats. Then the back was finished. I pulled DOWN a copy of the outside of the back (the one with the hollow) to use as the start of the seat. Then I selected ALL the back prims by holding down the Shift key and dragging across the bench back. With them all selected, I held down the CTRL key to turn on rotation and rotated the back TOGETHER to the angle I wanted. If you are not used to doing this be SURE you click and drag on the CORRECT color of the three colored rotation ball.
Using the same method, I made slats for the bottom of the seat, selected all the prim in the seat (maybe 9) and then moved them as one with the arrows to line up with the back.

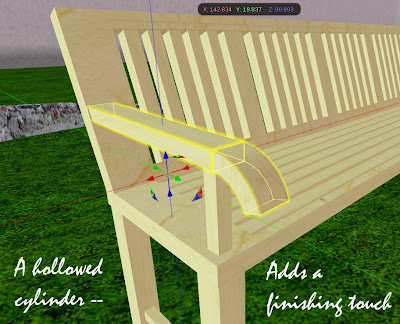
So far the bench is ALL about boxes. Rectangles are king here. But a little softness would be nice.
I made a new cylinder, hollowed it and used PATH cut to slice an appropriate shaped section out. The "height" of the cylinder needed to be the same as the width of the chair arm. Other than that I just cut and moved the new curved piece over to the arm to see EXACTLY what width and thickness it needed to be. The thickness was controlled by the hollow.
I highlighted the complete build. (Remember -- at least now at the beginning, linking along the way is dangerous. If you DO link, be sure and unlink the parts of your build before linking them for the final time.) I then double clicked on one of the slats in the seat which was set at 0,0,0 rotation (most always a good plan) and linked the bench. I added a darker wood texture from the library and adjusted the direction and pattern of the textures on the different parts.
It still needs some pose ball or "pillows" for the sit function. By the time you read this, that may not be necessary.
That's a bench. 45ish prims in all.


No comments:
Post a Comment